Tuesday, July 29, 2014

Photo Shoot with Nahji


oooohhh, she's dusty...:P


^^too bad this photo came out a little blurry, it is really good!^^

Just a quick little photo shoot with Nahji.
~Claire


Saturday, July 26, 2014

Some New Videos

Hey guys! I have some videos I've uploaded recently on my channel Claire M. and meepcharms. Here they are!

How to Be A Potterhead w/ Emily Ep. 1

Cute Little Mushroom Polymer Clay Tutorial

Tips and Tricks on Glazing

And I can't find the last one  the add a YT video thing on blogger, so yeah, but I opened a Kiss Hello Kitty Blind Bag.

Also, Elizabeth Wears will be one day late, because I won't be here all day tomorrow, and I didn't have the post photographed yet. If we get home early enough though, I might post some pictures from photoshoots I never posted about.
~Claire

Thursday, July 24, 2014

Craft- Oreo Creme Pie

Dolls all across the world can say "Mmmmmm", now. :) Today I'm going to show you guys how to make these slices of Oreo creme pie!

You will Need:
*Black felt
*Black thin foam
*White thin foam
*White thick foam
*Scissors
*White or creme colored puffy paint
*Pencil
*A quarter or bottle cap to trace
*Hot glue gun/hot glue

First we are going to make the Oreos for the top. Only make one, because I didn't even use a whole one.
1) Trace 2 (ONLY 2, not 4) circles with the quarter or bottle cap onto the black foam.

2) Cut them out.

3) Trace onto the thin white foam, but only once.

4) Cut it out.

5) Glue the Oreo together like so.

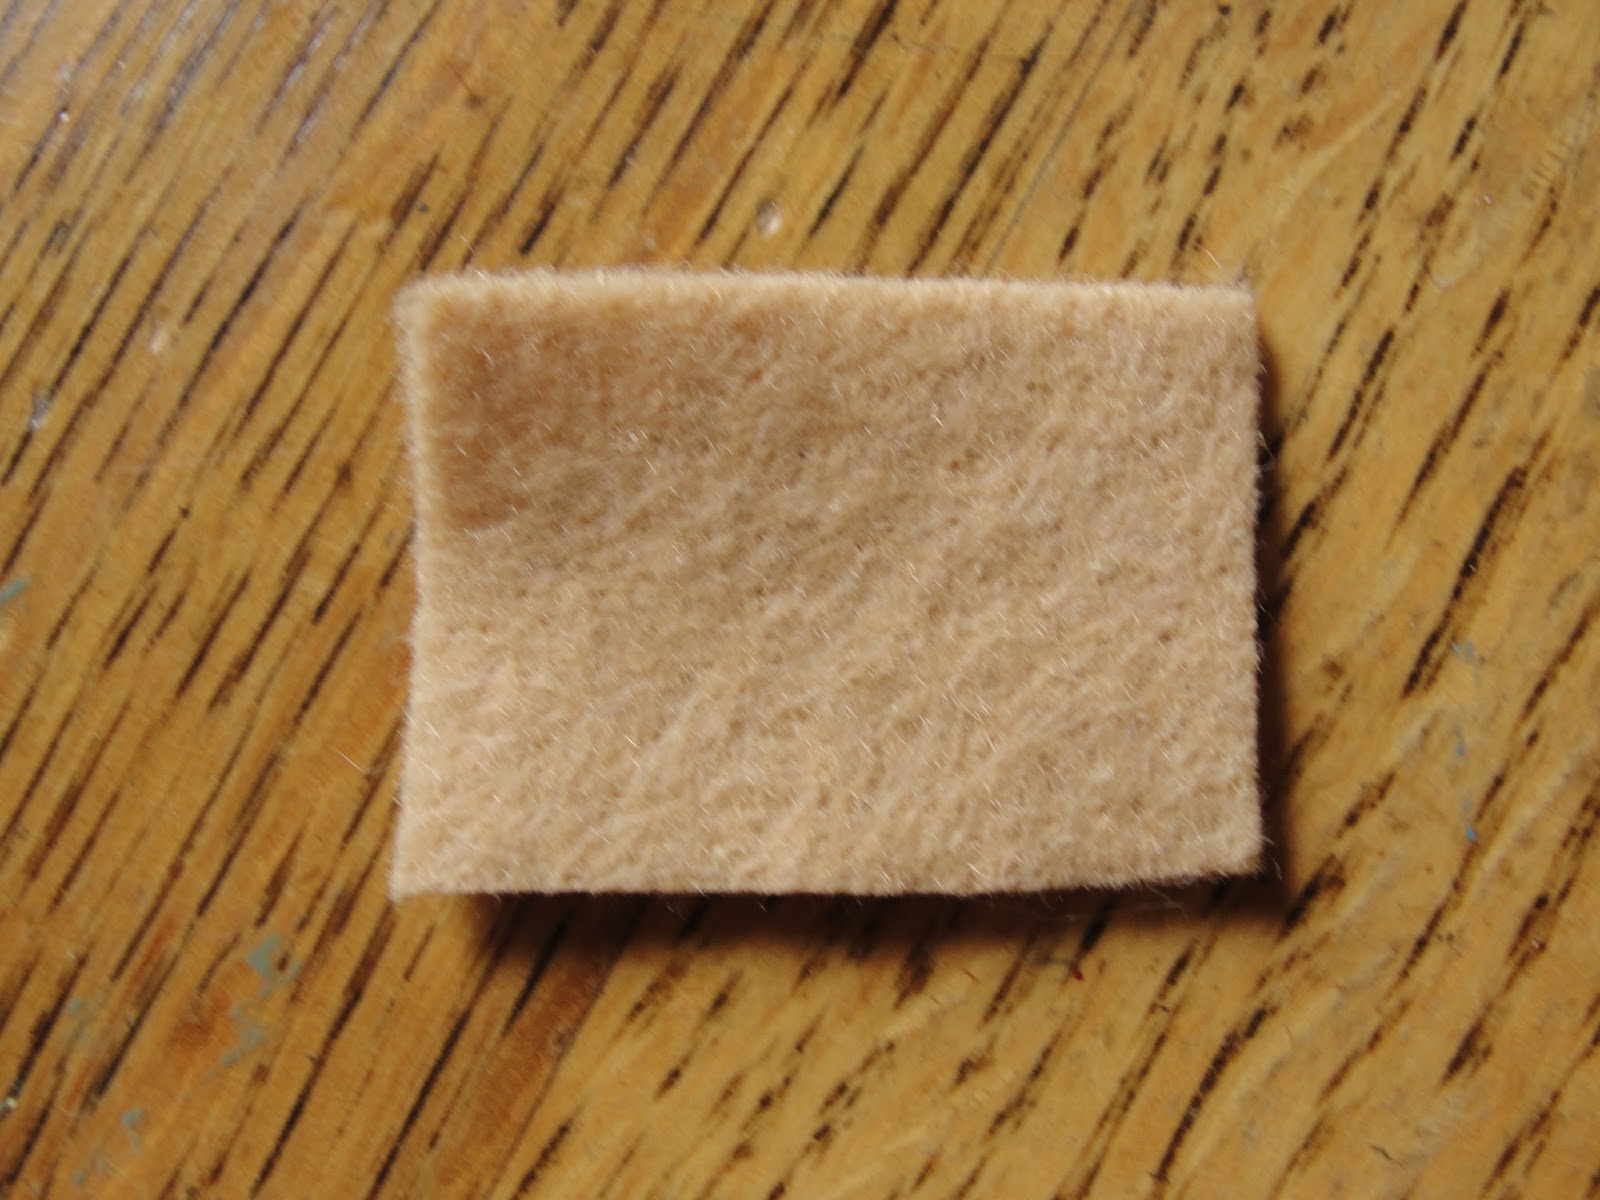
6) Cut a triangle out of the thick white foam for the pie. 

7) Glue it on some black felt for the crust.

8) Trim around the sides, leaving some at the back that is a little bit wider that the thickness of the foam.

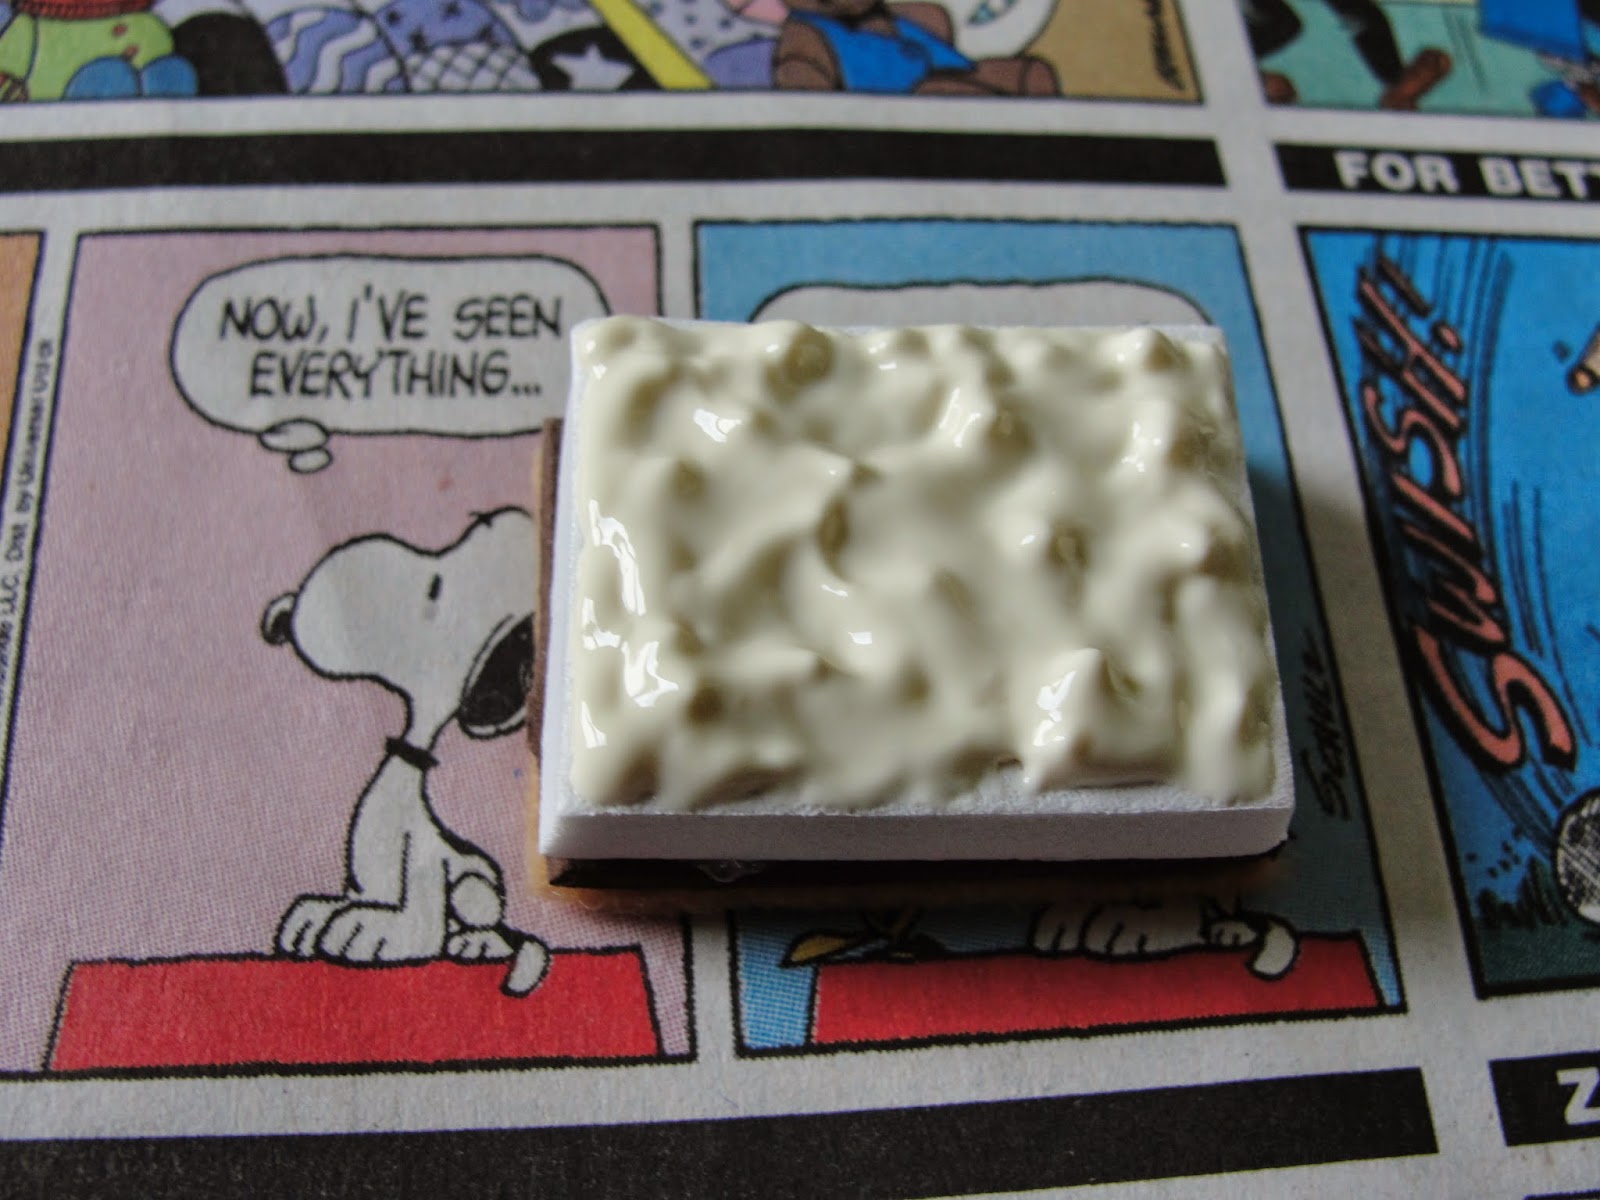
9. Glue it to the foam like so.

10. Squeeze puffy paint on the top.


11) While the paint is still wet, cut up the Oreo into tiny pieces and place them on top.

Let dry, and you're done!


Poor dolls have to eat with their hands, they have no silverware...


BTW, I uploaded Emily's first vid on how to be a Potterhead, but it's STILL uploading, so I will put it in here when it's done...or you can go and subscribe so that you won't miss it. :)

~Claire


Wednesday, July 23, 2014

Meepcharms! (New YT channel)

Hey guys! Today I made a YT channel with another one of my passions- polymer clay charms and miniatures. It's called meepcharms! I had posted a clay vid on my doll channel, but it didn't seem right there, so I made a channel just for clay! Of course I will still be posting here and on my other YT, but I wanted to do something different also. HERE IS THE LINK TO MY CHANNEL!!!!!

Please check it out!
~Claire

Tuesday, July 22, 2014

Craft- S'mores Bar

Today I have a pretty easy craft to do on a lazy summer day- s'mores bars! What doll doesn't like graham cracker crust, a layer of chocolate, ooey gooey marshmallow, and chocolate pieces? Your doll will L.O.V.E. them, so I recommend making several. :)

You will need: 
*Brown thin foam
*White thick foam
*Tan felt
*Pencil
*White or cream puffy paint
*Rectangle template in the size you want the bars to be (mine is a craft wood piece)
*Scissors
*Hot glue/hot glue gun

1) Trace your template onto the tan foam.

2) Cut it out.

3) Trace your template onto the brown thin foam.

4) Cut it out and glue it on top of the felt.

5) Trace your template onto the thick white foam.

6) Cut it out and glue it on top of the brown foam.

Foam is great, since it has the texture of a marshmallow!

7) Squeeze the puffy paint on top. I like to have peaks on mine, it just gives it a more marshmallow-ey feel. :)

8) Cut tiny pieces of brown foam and put them on the puffy paint while still wet. It helps to place them on with a toothpick.

9) Allow to dry.

Done!


Enjoy!

~Claire

PS- Sorry we haven't been posting (we were supposed to post this last Tuesday!), life has been SO 
busy... :P

PPS- Please check out Emily's new series!


Monday, July 14, 2014

Quick Craft- Doll Mascara

Today I'm going to show you a quick and easy way to make a mascara brush for your dolls!

You will need:
*Sharpie in your choice of color
*Braces brush (I have braces, so I get a lot of these from the orthodontist) or small bristle brush (such as a bottle brush)

All you do it color the bristles on the brush with your Sharpie, making sure you color it all.
Wait for it to dry, which for me was 2 seconds, and you're done!


*I am not responsible if the Sharpie rubs off onto your doll's skin! If you don't want to risk it, don't use it on your doll's face.*

~Claire

PS- I uploaded a video!

Watch until the end for bloopers. :)

PPS- If you have a Pottermore account, I just got mine, so if you could friend me, I'm HazelWombat12175
If you are a Harry Potter fan, I would recommend signing up, it's free!


Related Posts Plugin for WordPress, Blogger...